Handmade at home
Today’s theme is handmade at home.
It is difficult to go out, but here is MURAN, and I would like to introduce UV resin as a product that can be made at home.
Preparation
UV resin is a resin that hardens when exposed to ultraviolet light.
(There is also epoxy resin, but I think that UV resin is easier because it mixes and solidifies the two liquids.)
You can create glittering accessories by embedding parts such as beads and glitter in the resin.
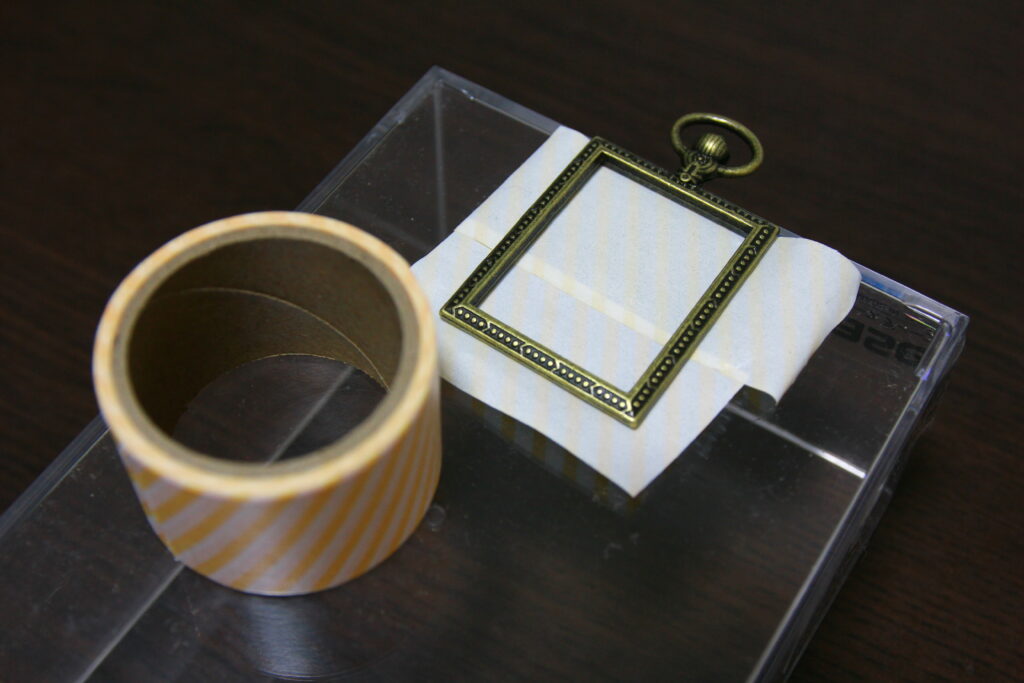
◆Materials
・UV resin
・Flame
・Parts
⇒Anything like lame or beads is OK. Nail seal materials and pressed flowers are also convenient and beautiful.
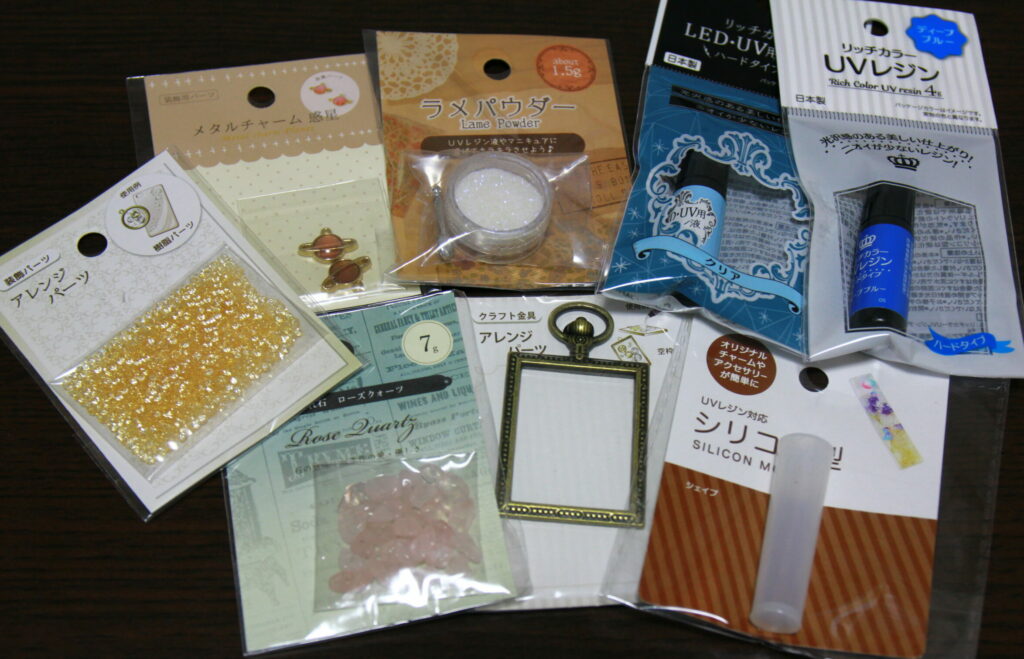
◆Tools
・Pick
・Masking tape
・Flat table
◆Useful tools
・UV light
⇒UV resin I used is hardened even by sunlight or fluorescent lights, so even without lights, it’s OK! Since it takes time, it is more convenient if you want to make it efficiently.
Task 1: make a foundation on the flame
The flame that I used is an empty frame without a bottom, so a bottom base is needed.
Paste the masking tape to make the base.
Task 2: Add a little resin
If you embed the base together, you can skip this step and it is OK.
Just like me, if you remove the bottom of the masking tape or the like at the end, you need to put a little resin first and the parts will come out from the back and it will be “Ouch!”

I wanted to get a gradation, so I bought two colors of resin. The top is deep blue and the bottom is clear.
It looks a bit more solid than the honey.
Use a pick to stretch the resin.
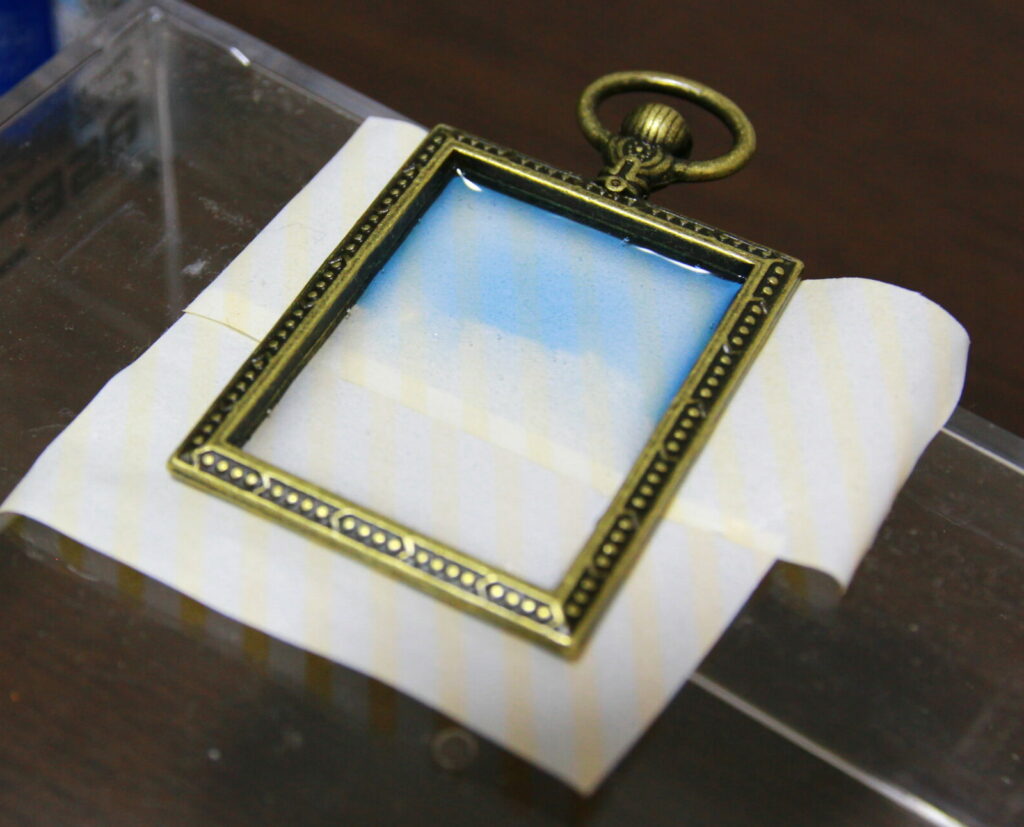
If air bubbles enter at this time, crush with a pick.
Task 3: Insert parts
Now, let’s put the parts.
A pick is very active at this time. Fine adjustments can be made with a pick, so let’s put it in without hesitation.
After inserting the parts, lightly stiffen them in the sunlight.
I added extra resin before hardening, so the wait time was really long.
(About an hour on a cloudy day)
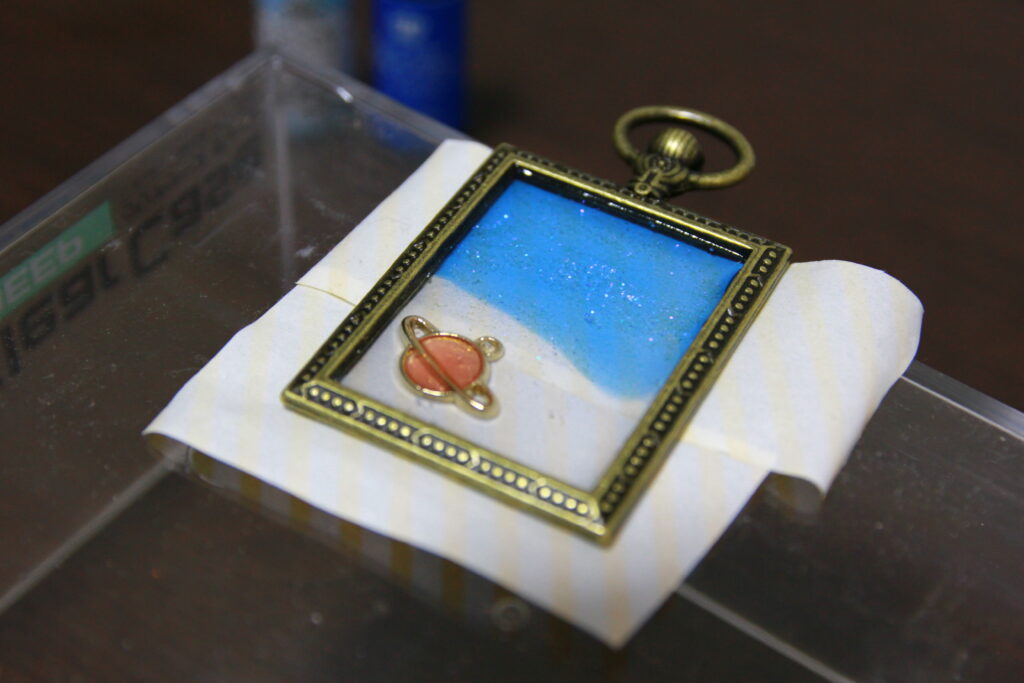
The beads were once placed in the lower right corner of the clear base, but they were too inconspicuous so they were repositioned to the blue part.
The light blue color around the beads is due to the clear base resin remaining on the beads. I don’t care.
The border between the two colors of resin was swirled with a pick and gently swirled to make it look like a gradation.
Task 4: Harden
I will harden it against the sunlight.
As mentioned above, it is more efficient to use a UV light. It hardens about 10 times faster.
It seems to be hardened even with fluorescent light, but as I actually tried it, I felt that sunlight was faster even on a cloudy day.
There is also a difference in the ease of setting depending on the type of resin.
The curing time of the resin I bought is “fine weather: about 5 to 30 minutes”, but after one hour even in cloudy weather, it solidified tightly.
I think that you can make another one while waiting.
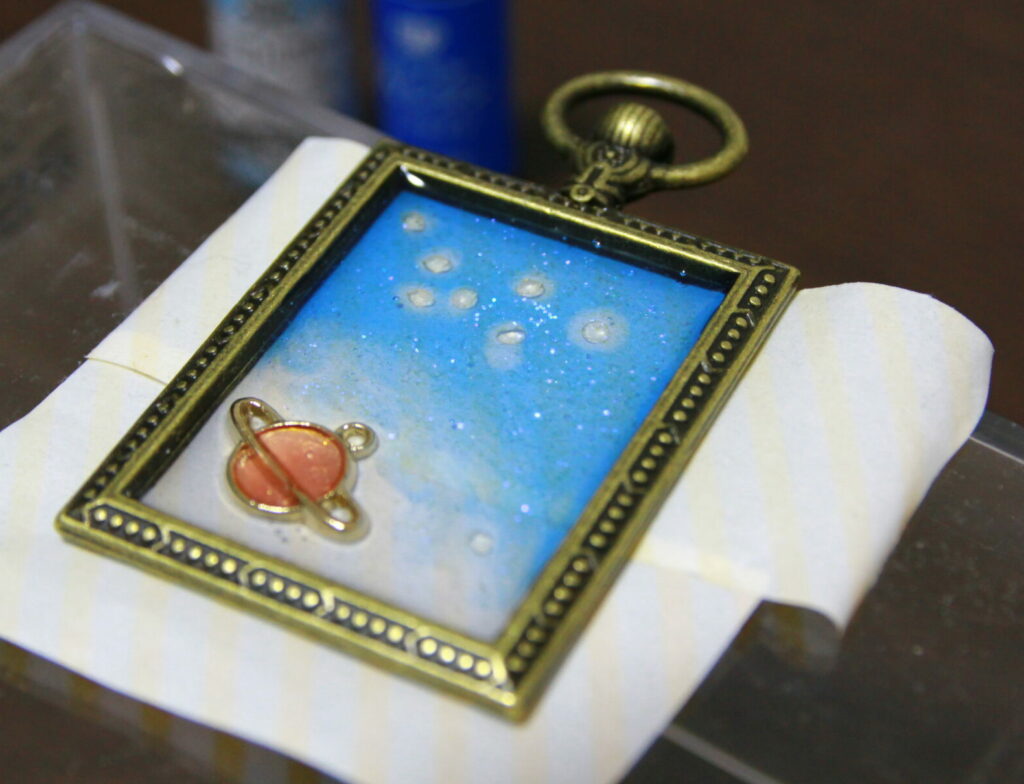
Task 5: Add Resin and Parts
When it has solidified, add resin and parts.
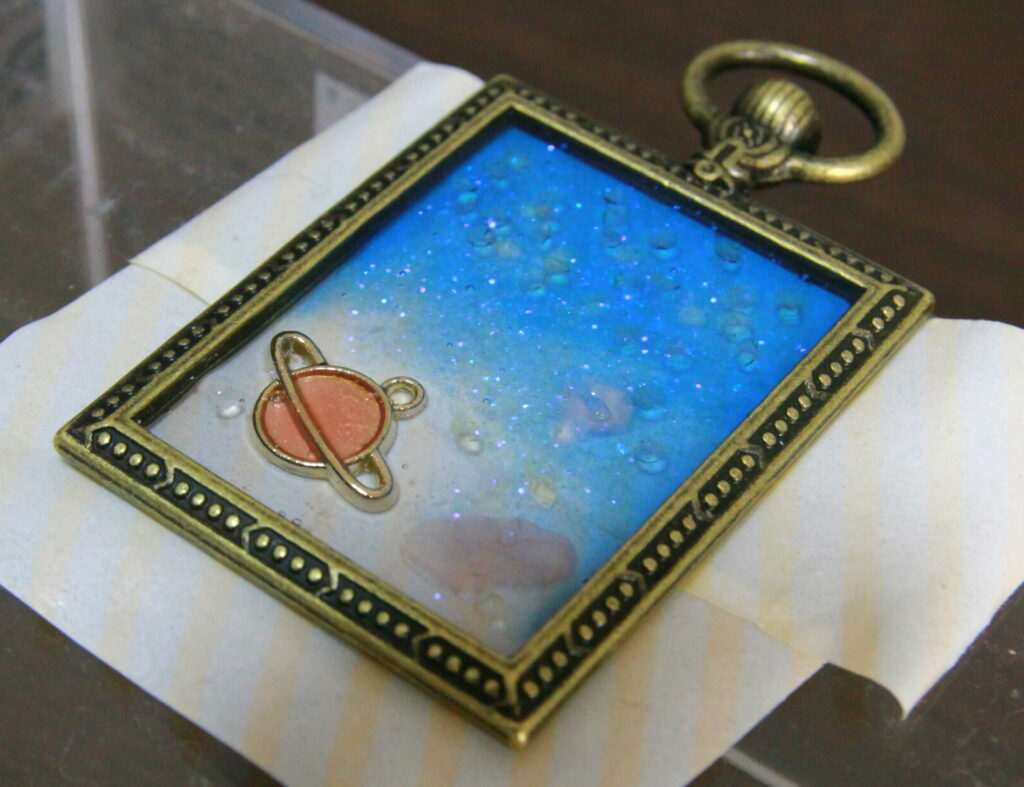
It’s hard to understand if it’s a picture, but the height is different between the parts that are hardened first and the parts that are inserted later, so the depth is beautiful.
Also, I think it would be better if there were a few more parts. lol
Complete!
Once again hardened by sunlight, remove the masking tape and it’s done!
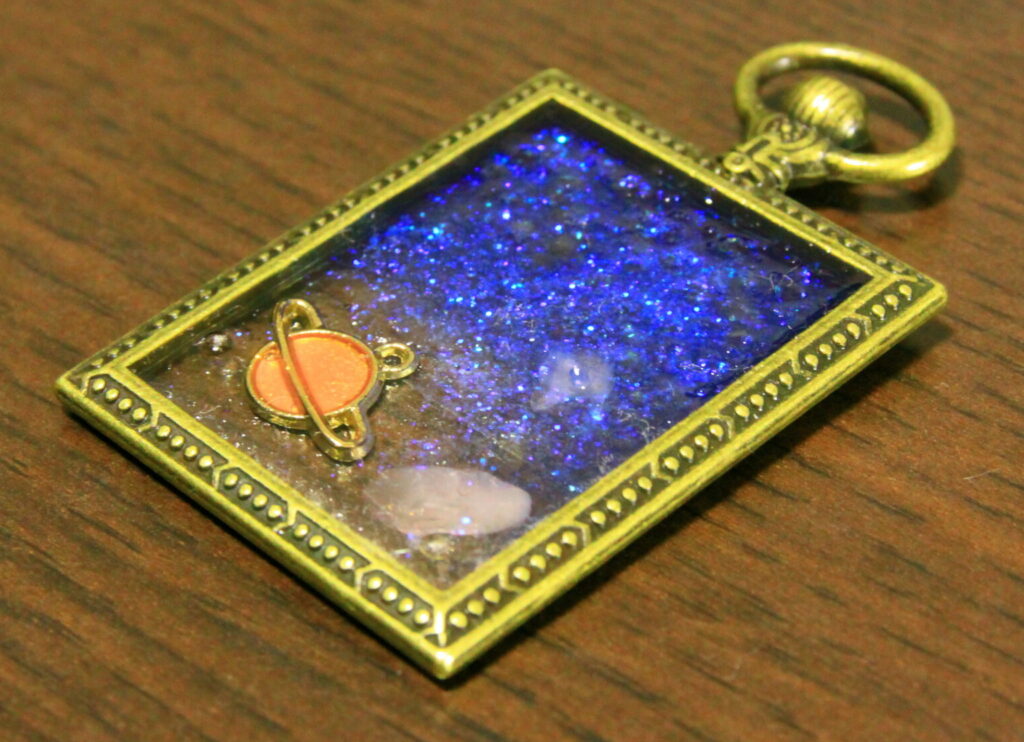
The blue became darker than before it hardened.
Curing will certainly darken the color a bit, but the difference in this photo is a matter of how the photo is taken, light and background. (I’m sorry I couldn’t match well …)
The work itself is easy, so how about with your child?
However, there are some small parts and resins that can be dangerous if they enter your eyes or mouth, so be careful.